Ditch the sweat and arm workout of traditional pasta-making, and say hello to the efficiency and ease of a stand mixer! Fresh egg pasta dough makes tastier and cheaper pasta than most pasta you’d buy in the store! Can you use a stand mixer like KitchenAid to make fresh pasta? You sure can, but there are a few things you’ll want to keep in mind. Keep reading to learn how to make pasta dough and stretch and cut pasta with a KitchenAid stand mixer!
How to Make Fresh Egg Pasta Dough (the Traditional Way)
In order to understand how to make pasta with a stand mixer, it helps to understand a few things about making pasta with traditional way—by hand!
The rule of thumb is this:
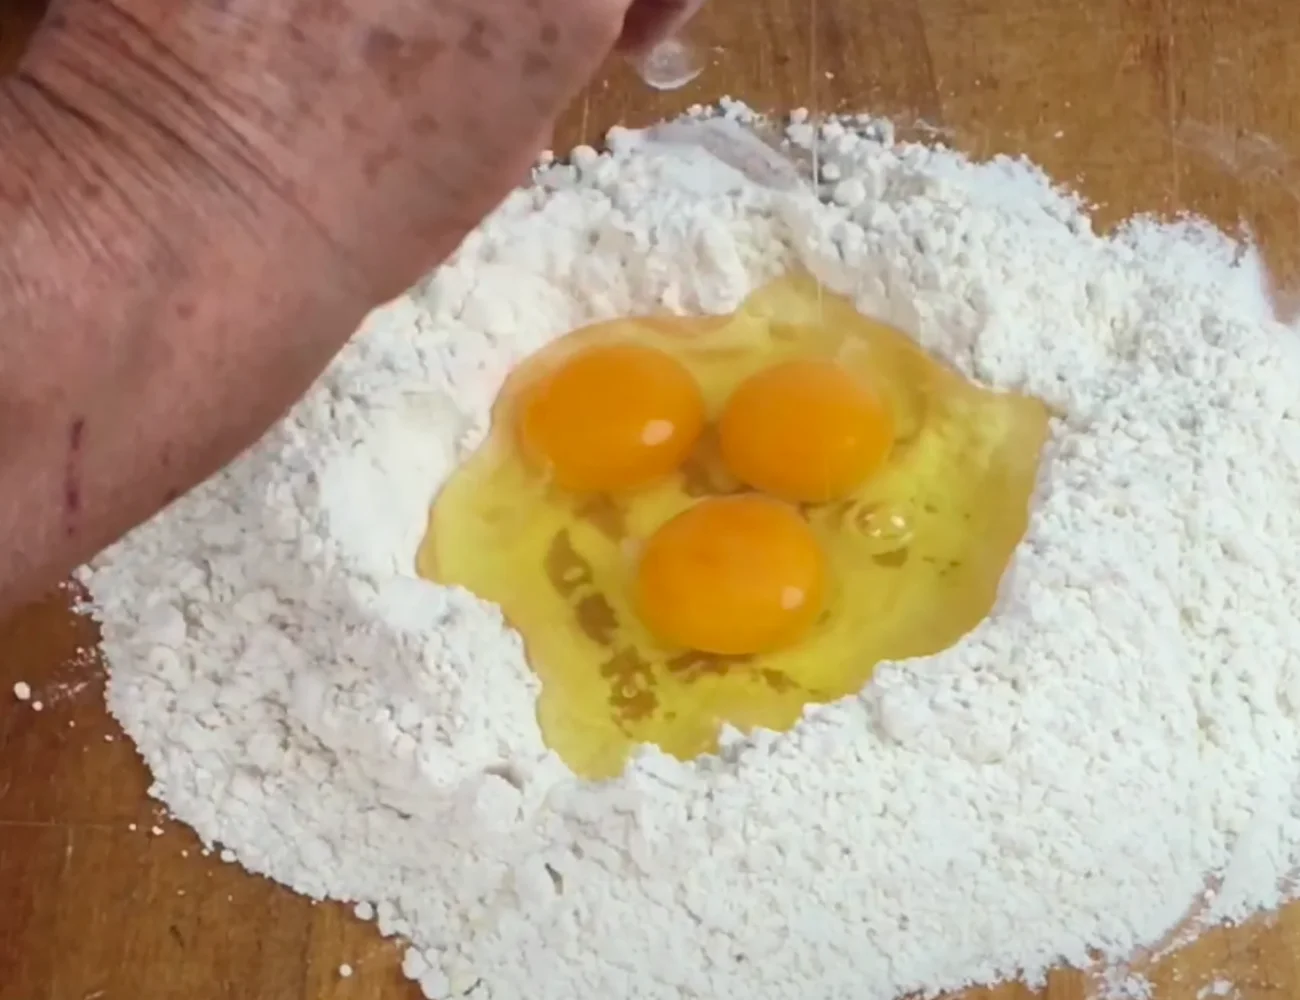
- 100 grams of flour + one whole, large egg = pasta for one person
How should our dough ball look at the end?
- Our final (kneaded) dough ball should be smooth and spring back with a gentle touch—not sticky.
We’ve all seen pasta pros making pasta the traditional way. They add a pile of flour to a work surface. Then, they make a well in the center of the pile of flour and add whole eggs to the well. The eggs are beaten into the eggs, pulling flour in from the sides a little at a time until the dough is able to form a ball. Finally, the ball is kneaded until it is smooth and elastic. Presto: pasta dough!
Why is this the traditional way of making fresh pasta dough? What’s the deal with making a ‘well’ with the flour and putting the eggs in the center?
While the rule of thumb is 100 grams of flour for every whole egg, the reality isn’t as precise. Types of flour differ in how much moisture they can absorb. Humidity and temperature can affect how the exact same flour absorbs the egg from one pasta making adventure to the next. Eggs vary in size.
For all of these reasons, pasta pros know that flour must be added in a bit at a time in order to judge how much flour is needed. Pulling flour in from the sides a little at a time lets them do just that! Sometimes that flour on the outer edge of the ‘well’ never gets used!
Though making pasta by hand is relatively easy, the process can look intimidating if you are a beginner. You might be wondering
- How much flour do I mix in?
- How do I keep the eggs from running off the table?
- I have arthritis. How do I knead the pasta that long?
- How in the heck do I stretch pasta dough with a rolling pin??
From mixing to kneading and stretching, a stand mixer can simplify the work of making pasta. Here’s how:
How to Make Pasta Dough (with a Stand Mixer)
It’s best to make large quantities of pasta when making pasta with a KitchenAid or other stand mixer. This is because the dough hook works best when kneading larger quantities of dough. We recommended making pasta for 8 people at once. You can simply freeze any pasta dough you don’t plan to use right away.
Step 1: The Mixer Meet-Cute!
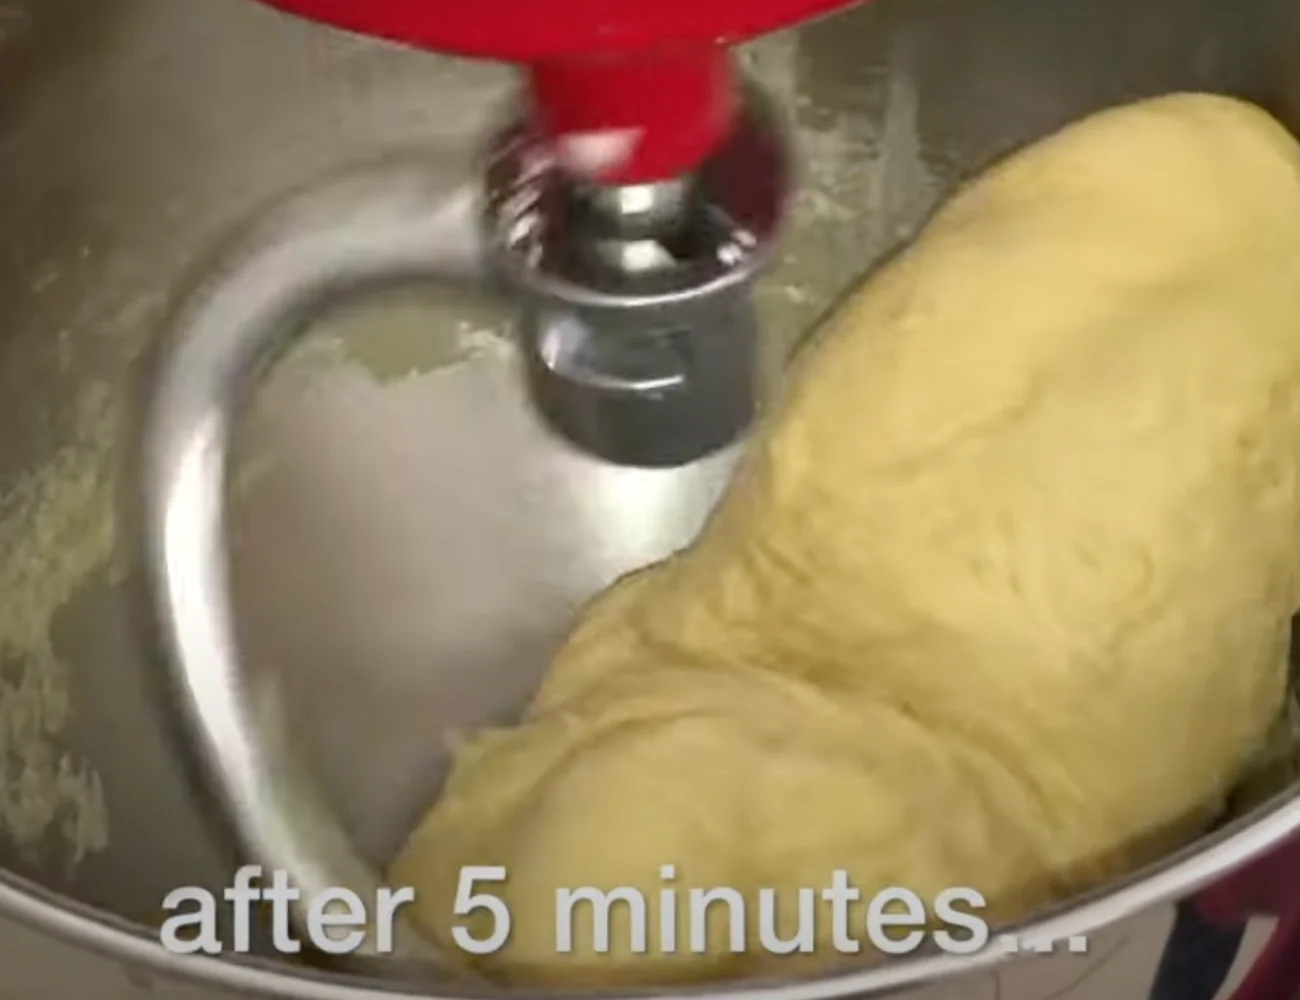
Start by attaching the paddle attachment to your stand mixer. Mix 3/4 of your flour and all of the eggs (remember, one large egg per 100 grams of flour!) at a low speed until they’re just flirting with each other. Don’t rush this romance, let it bloom naturally. The result will be a shaggy dough.
By adding just 3/4 of the flour to the bowl with the eggs, we take into account the fact that not all of the flour may be necessary. Just as we would pull more flour in from the sides if we need it when making pasta on a work surface, we can simply add a tablespoon of flour at a time if our dough needs it.
Step 2: Time for Commitment!
Now, swap that paddle for a dough hook. This is where things get serious! Knead the dough on a low setting for 5-8 minutes. Watch as your dough turns from a shaggy mess to a smooth, elastic dream. Too wet? Add more of the flour you’ve set aside until you see that the dough is no longer sticky.
You may end up using all of the flour by the end, or even need a bit more. As we’ve said: flour type, flour temperature, room temperature, and egg size can all affect how the flour absorbs moisture from the egg—and thus how much flour you need.
If the pasta dough seems too dry, you can add a drop of water or olive oil. But don’t add these ingredients until the end of the knead. The dough may seem ‘dry’ after 2 minutes but be sticky after 5 minutes of kneading. This is simply because the dough hook has had more time to incorporate the ingredients.
Step 3: Beauty Rest!
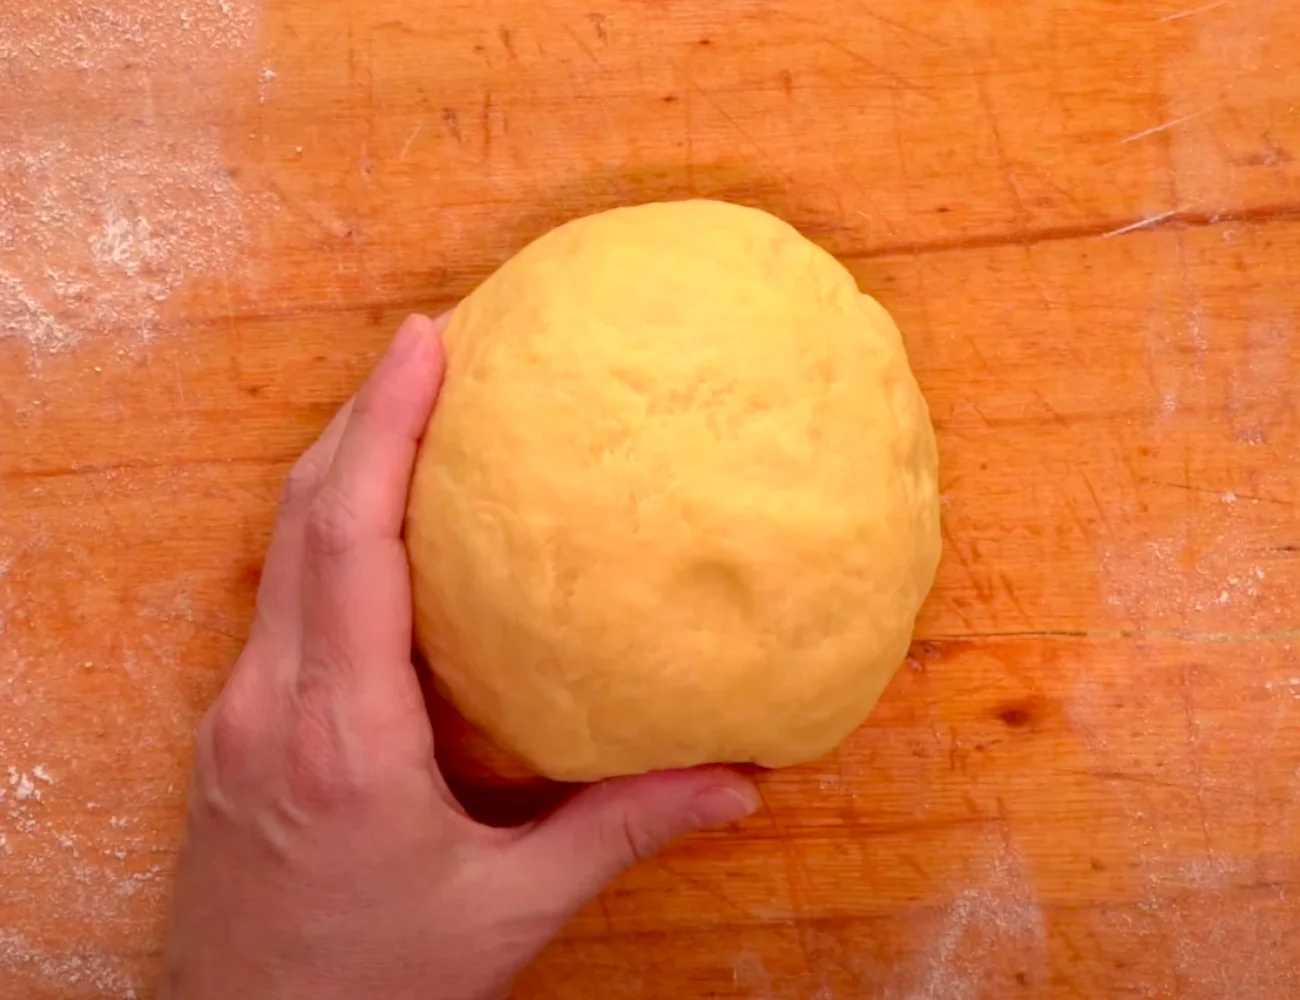
At the end of the 8 minutes, the dough should be dry to the touch (not sticking to your fingers). It should also be smooth and elastic. When you gently press into the dough with a finger, it should spring back to its shape. That’s the proof of elasticity.
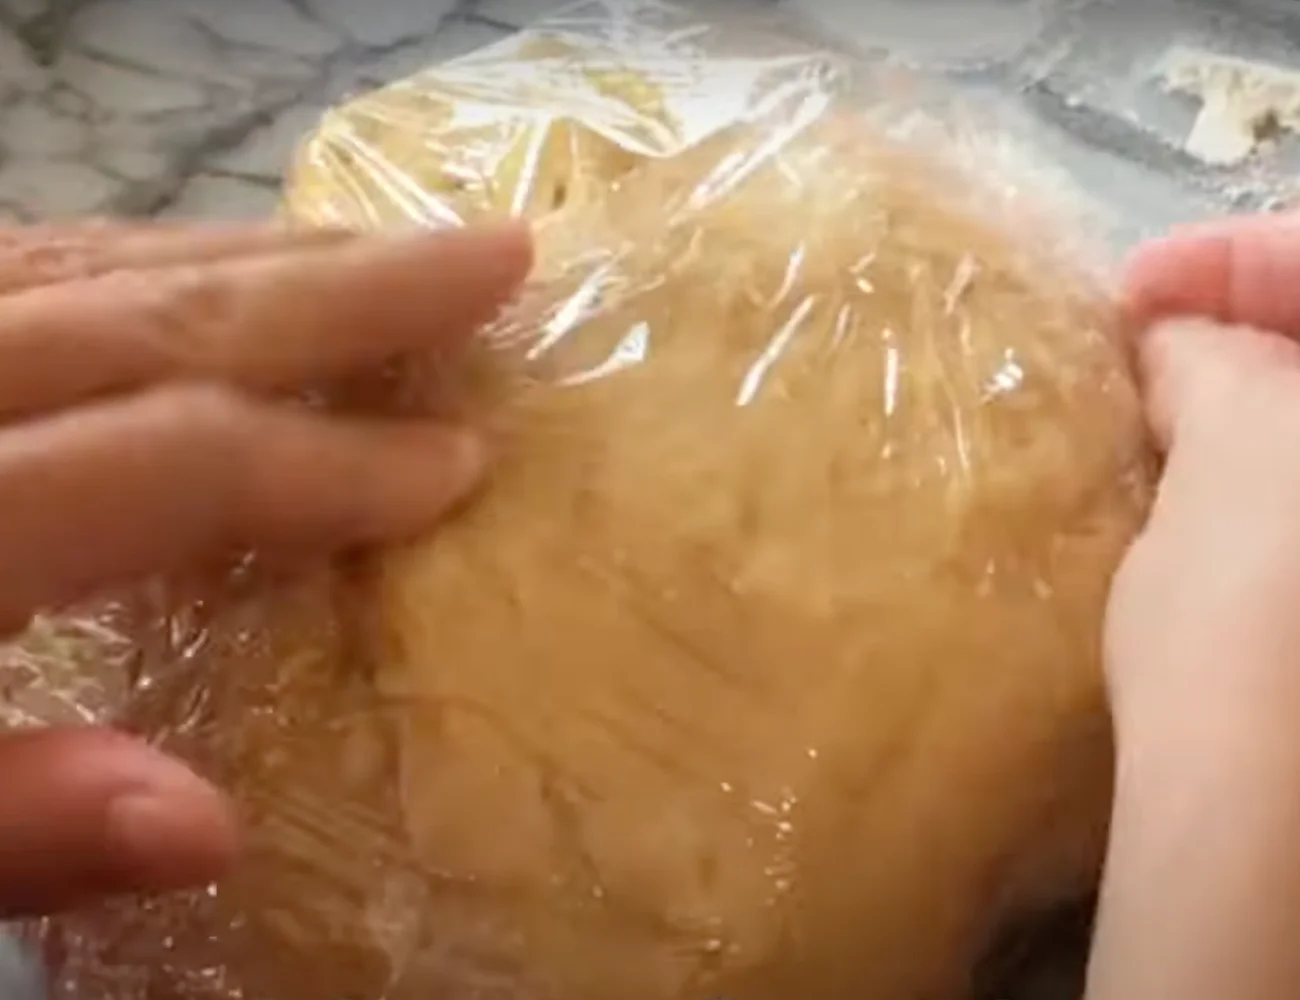
Wrap your smooth dough baby in cling film and let it rest in the fridge for at least 30 minutes. Yes, even dough needs its beauty sleep!
Step 4: Rolling with Style!
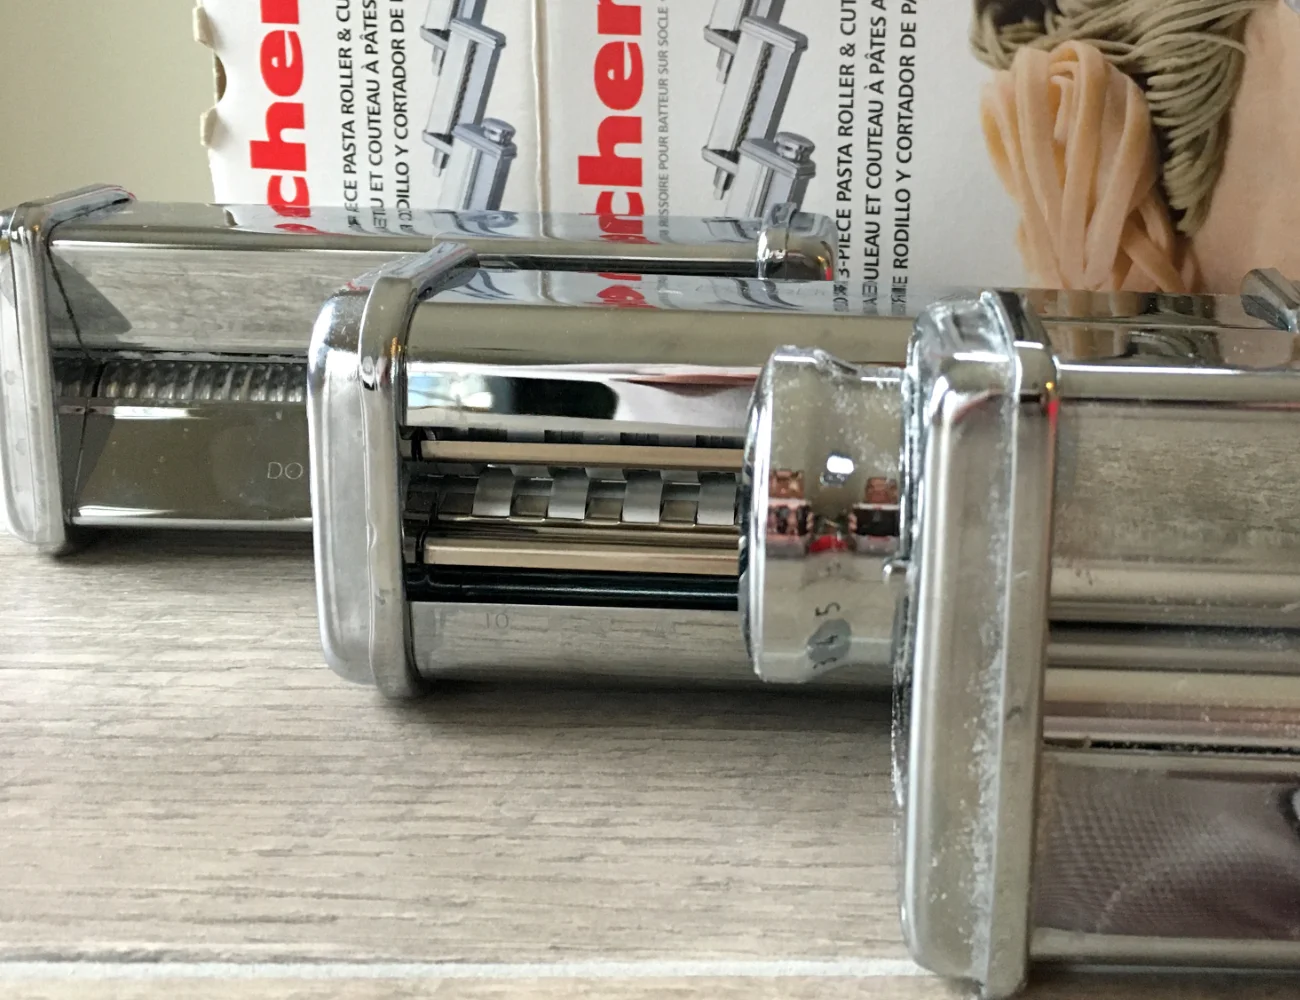
Fix the pasta roller attachment to your stand mixer. In most cases, these attachments are sold separately. Here’s a look at the KitchenAid stand mixer pasta attachments (set of 3):
Cut the dough into sections and flatten them.
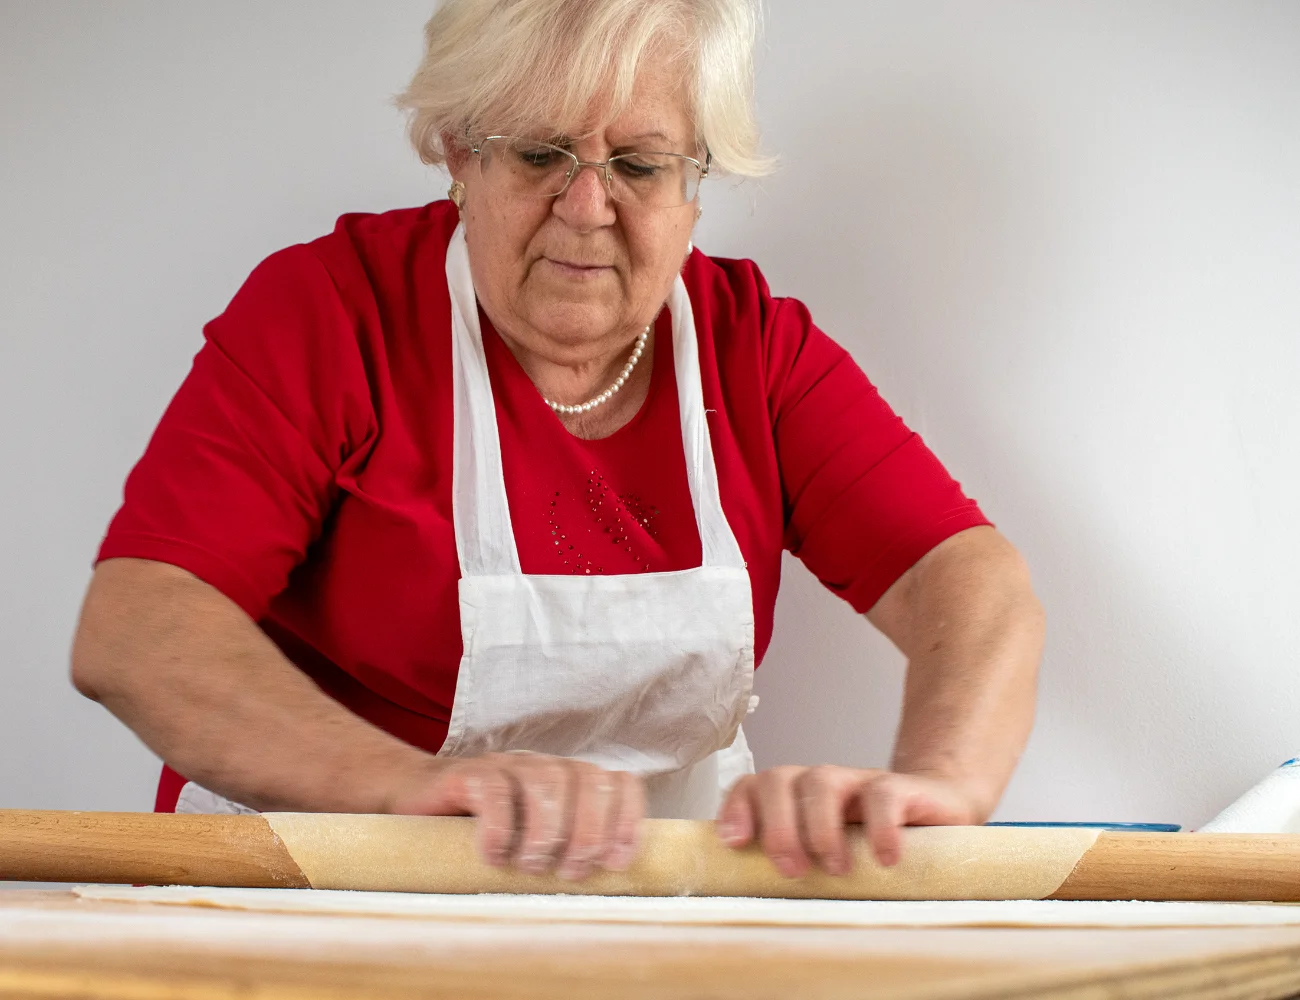
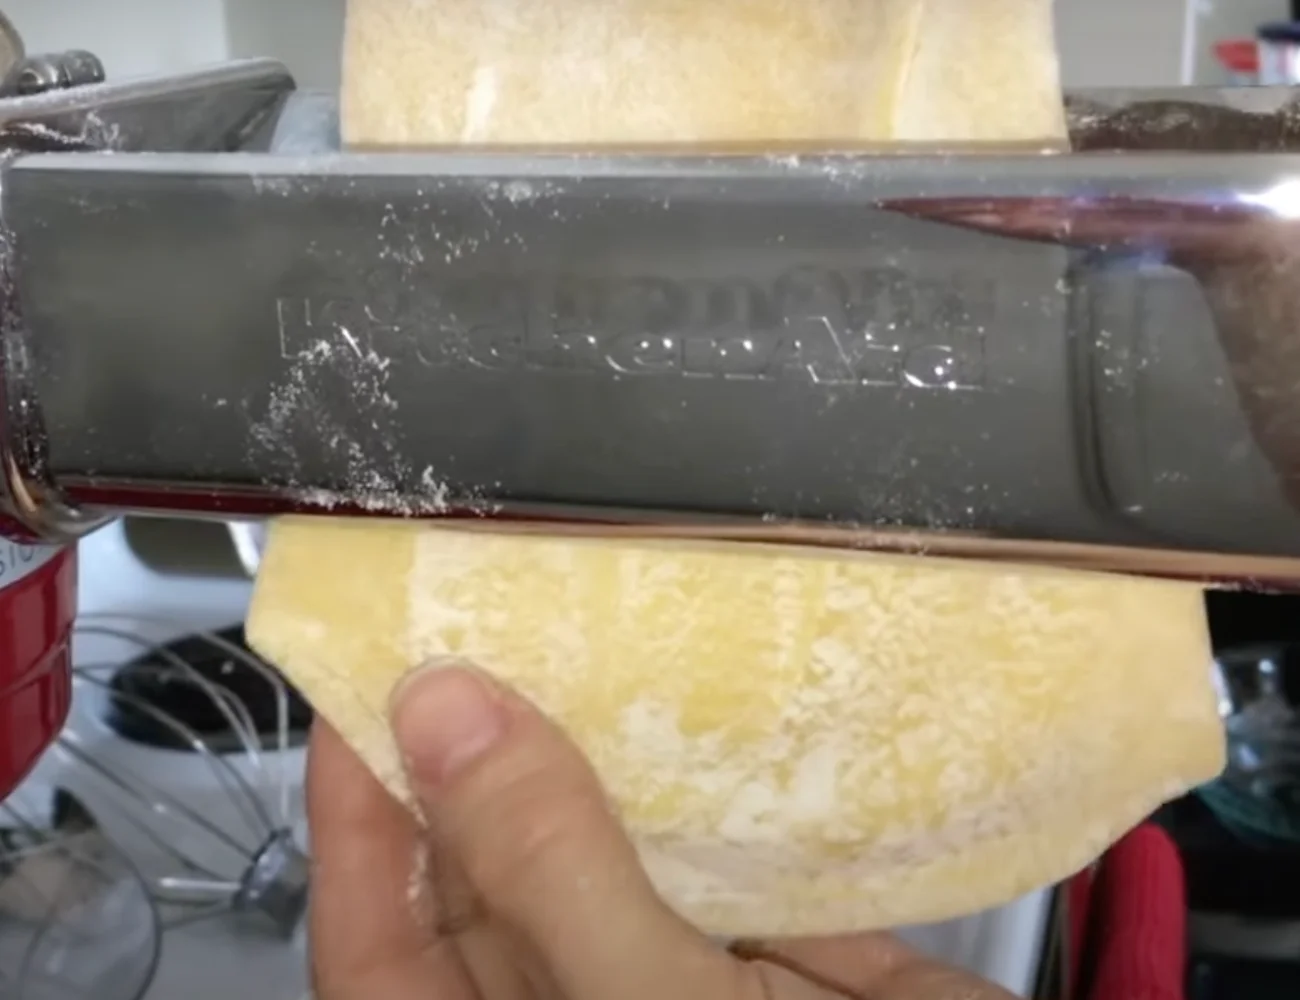
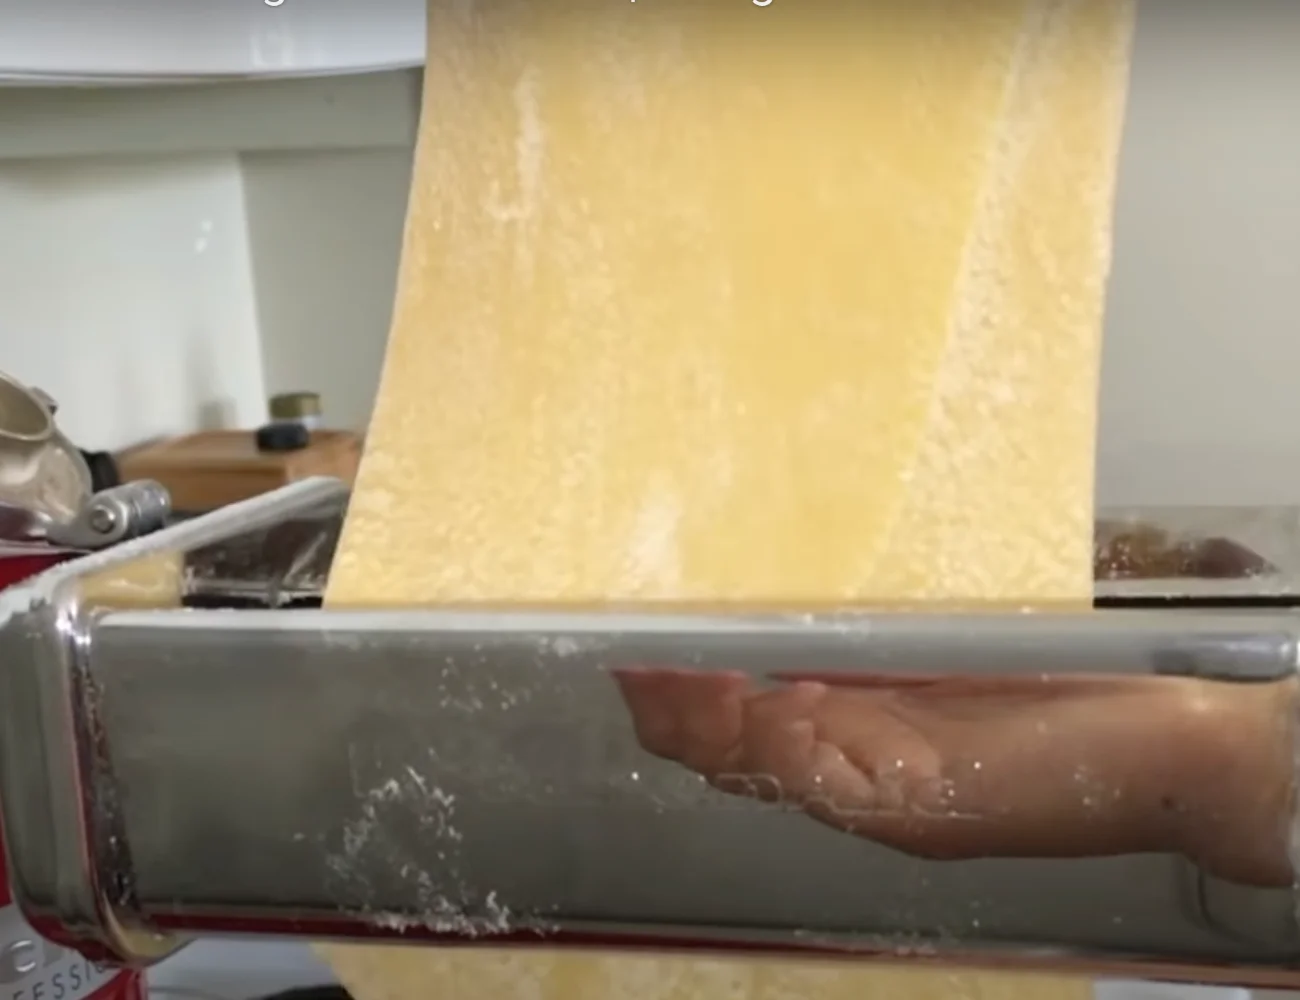
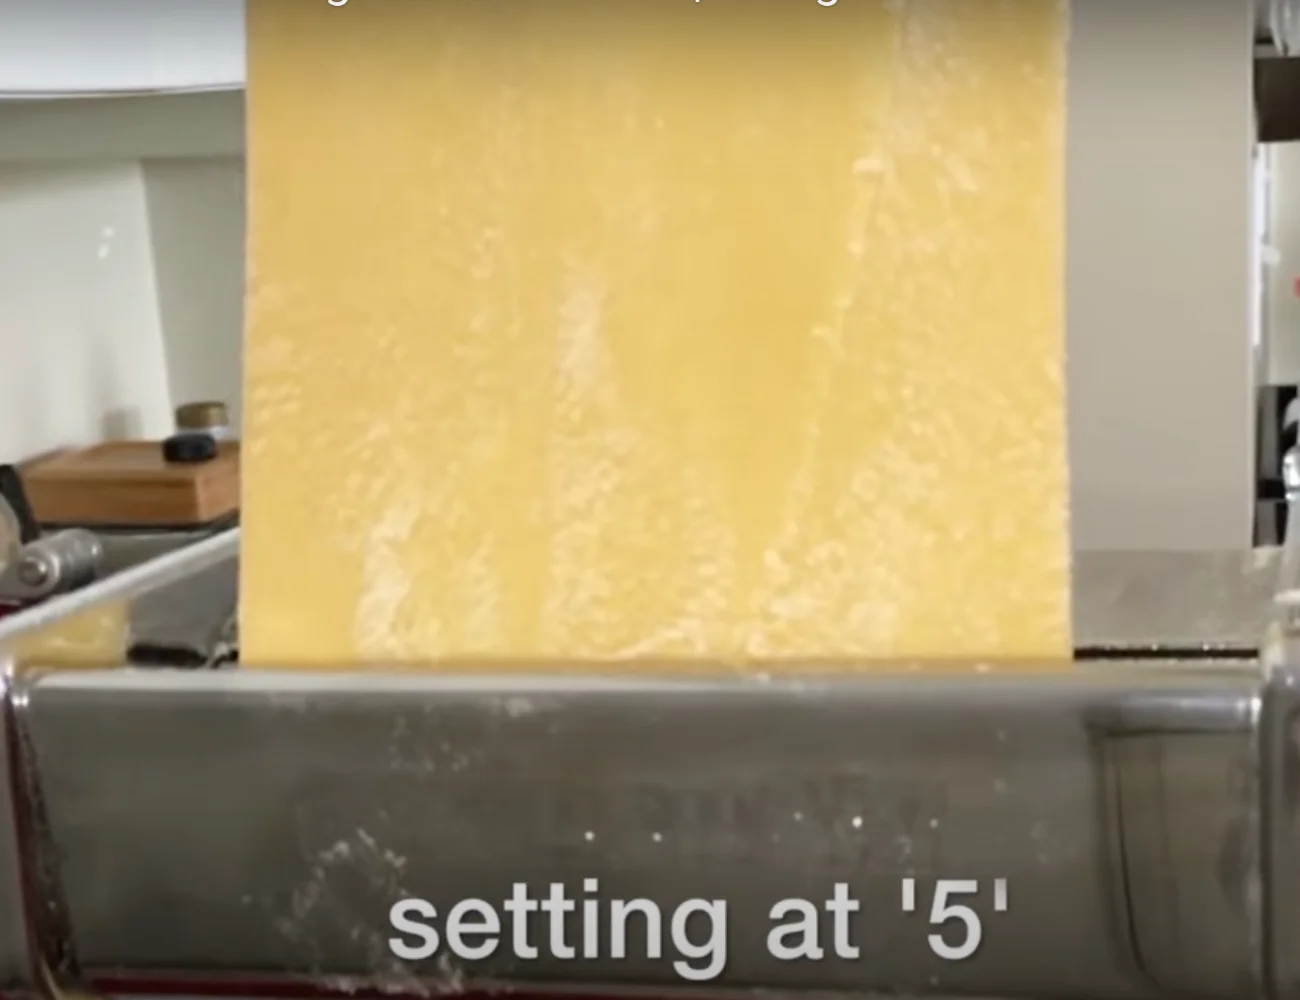
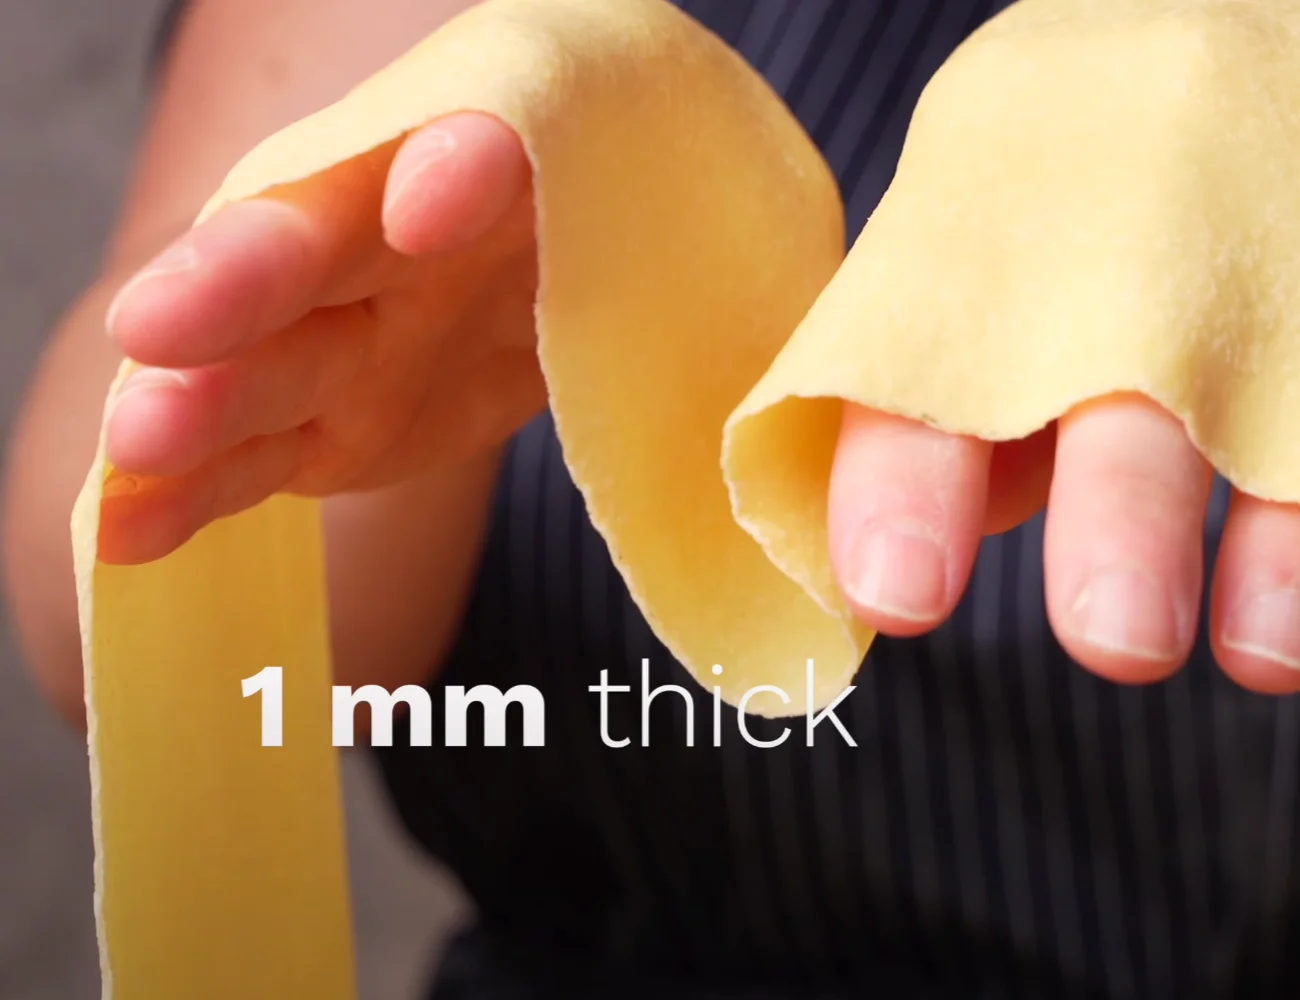
Start at the widest setting and pass the dough through. Decrease the width with each pass. Imagine your dough is on a journey from thick to fabulously thin! Use your recipe to determine how thin to roll out the pasta dough.
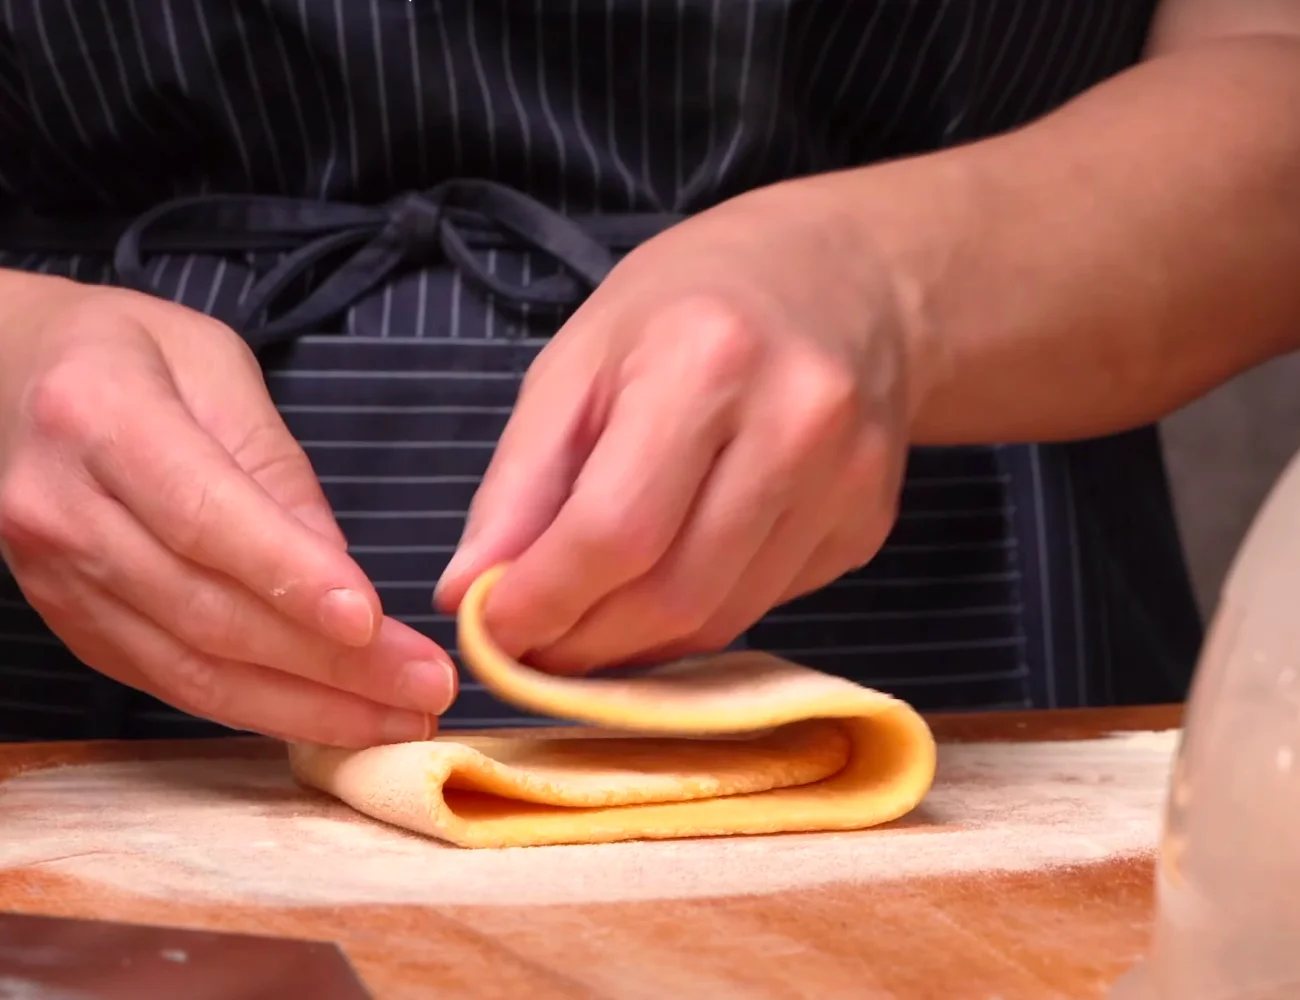
Fold the dough like a letter. Then use a rolling pin to flatten the dough so that you can better feed it through the widest setting of the stand mixer pasta roller. The dough on the initial pass should be about 3/4 the width of the roller.

We purchased our pasta roller attachments here (affiliate link), for anyone who is interested!
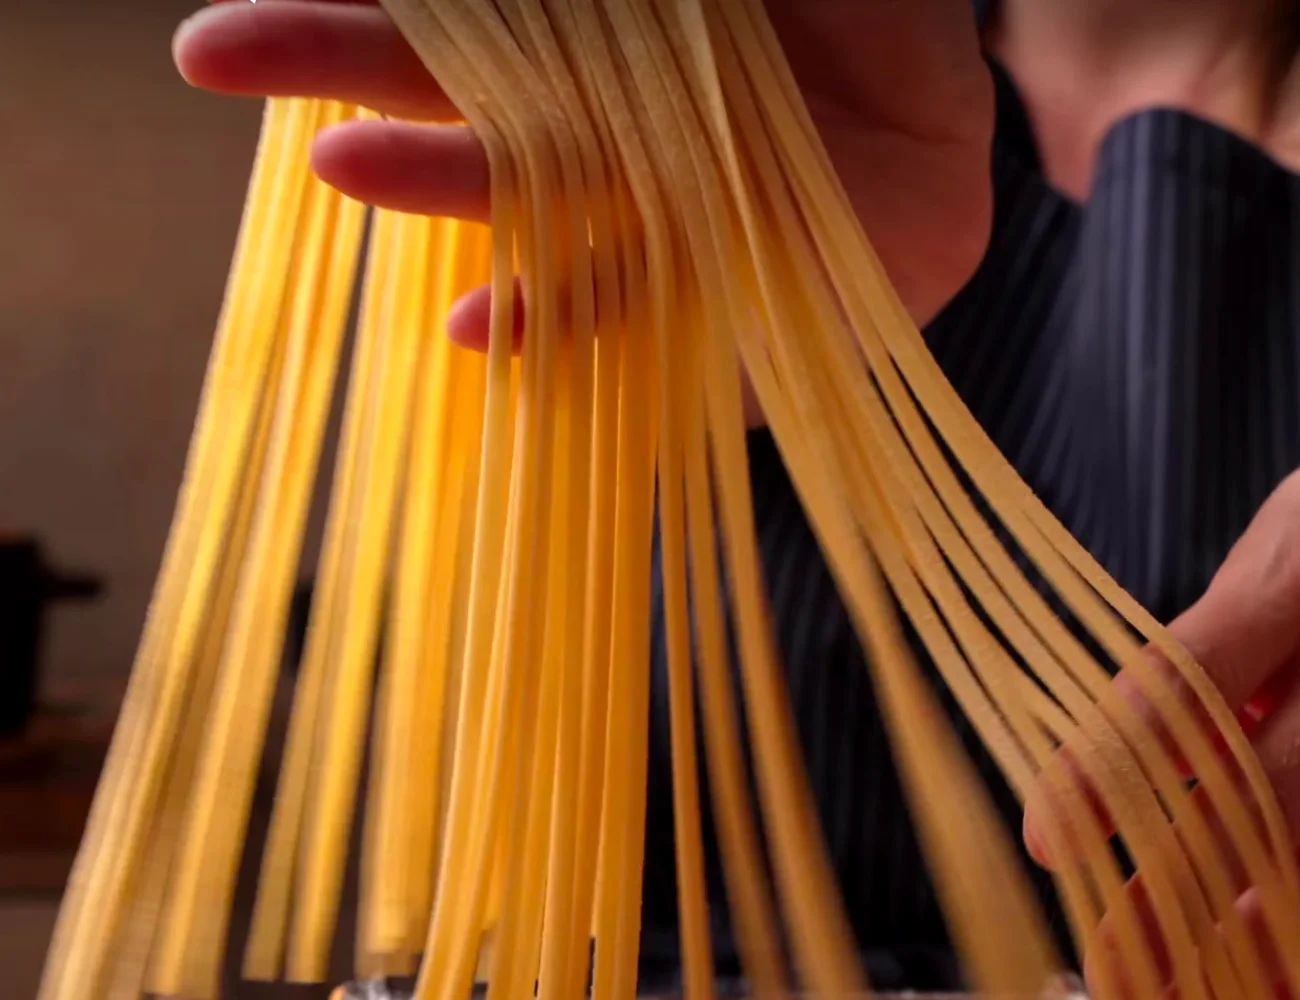
Step 5: The Grand Finale: Cutting!
Swap the roller for the cutting attachment (if you need it). Pass your pasta sheets through to cut them into gorgeous fettuccine or tagliatelle. If you’re feeling extra fancy, hand-cut them into pappardelle!
Step 6: Cook and Savor!
Dive into a pot of boiling salted water with your freshly cut pasta. In just a couple of minutes, you’ll have the star of your Italian feast ready! Toss with your favorite sauce, and voilà!
Your stand mixer just helped you churn out a show-stopping, homemade pasta with a fraction of the effort. Take a bow, and buon appetito!
Watch a Video Recipe!
We don’t yet have a video recipe to show you how to make and stretch pasta dough with a stand mixer. However, check out our comprehensive pasta making video to better understand this article and how to adapt the handmade pasta making process to use a stand mixer.

Subscribe to our YouTube Channel
More video recipes? Subscribe to our YouTube Channel (it’s FREE) and click the bell to get notifications when we release a new video recipe!
Tips for Making Fresh Pasta Dough with a KitchenAid or Other Stand Mixer
Make Large Batches of Dough
Not only is it more efficient to make a large batch of pasta dough, the stand mixer will do a better job of mixing a large batch of dough.
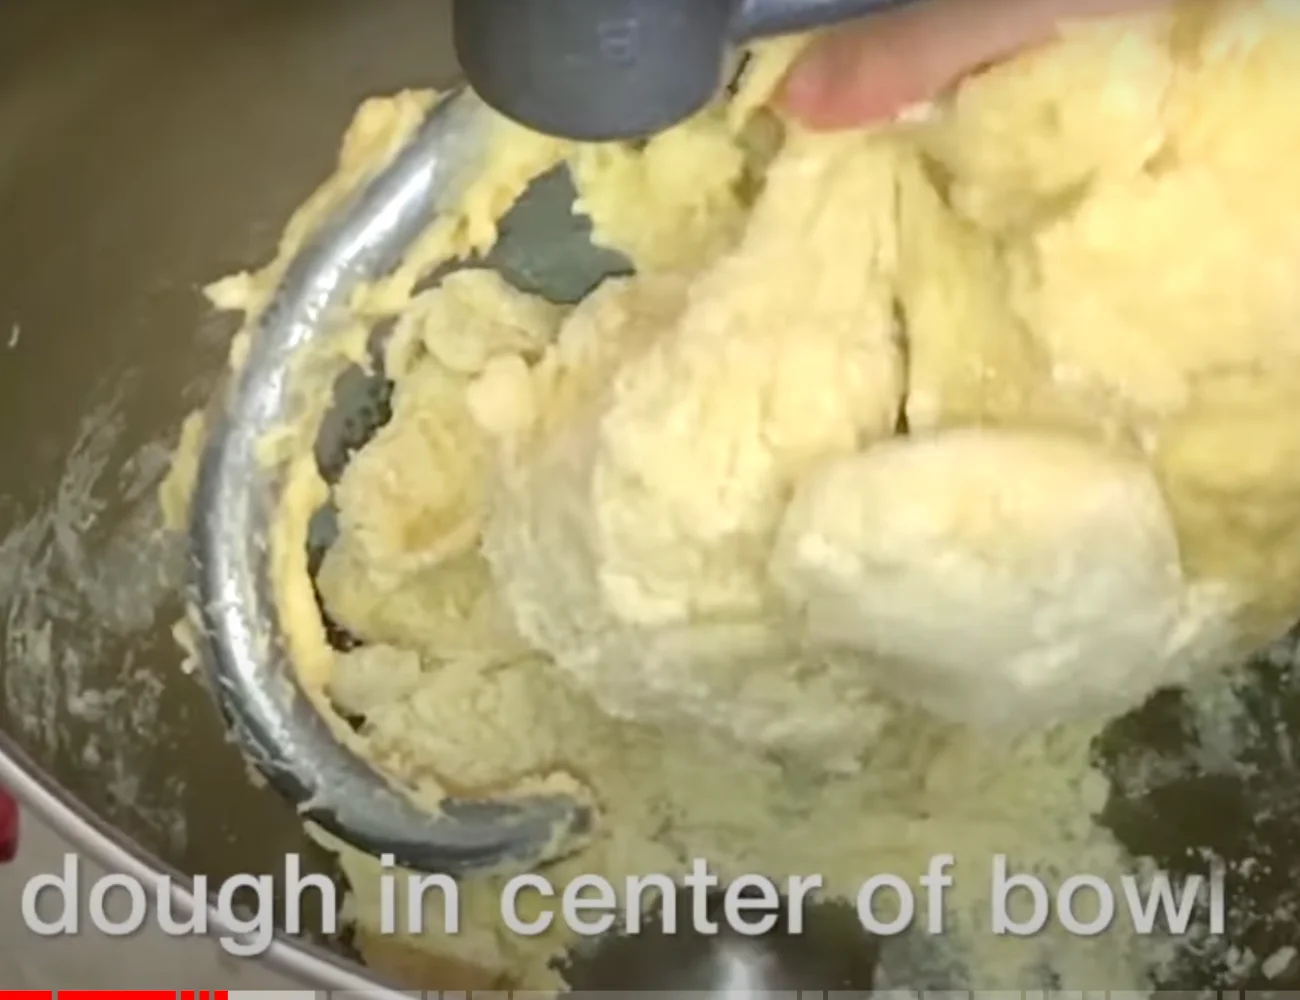
If you prepare a small amount of dough, you will need to periodically stop the machine and push the dough down from the sides towards the center of the bowl so that the paddle or dough hook attachments can reach all of the dough.
Dough Sticking to the Sides? Not Mixing?
If your paddle attachment or dough hook is struggling to reach the ingredients, periodically stop the machine and push the dough down from the sides with a spatula towards the center of the bowl so that the paddle or dough hook attachments can reach all of the dough.
How to Freeze Excess Pasta Dough
Pasta dough freezes wonderfully! Push the unused dough into a flat disk. Then put it into the freezer in a freezer-safe ziplock bag. By freezing the dough as a disk, the pasta dough will thaw more quickly than a ball would.
Dough Still Too Soft/Sticky When Stretching?
To solve this problem, simply sprinkle extra flour on the dough before passing it through the pasta roller.
Dough Too Dry When Stretching?
Add a drop or two of water or olive oil and knead that into the dough.
As an Amazon Associate, we earn from qualifying purchases. This means at no extra cost to you, PIATTO may earn a small commission if you click the links and make a qualifying purchase.

How to Make Fresh Pasta Dough with a Stand Mixer (KitchenAid)
Equipment
- stand mixer paddle and dough hook
- Stand Mixer Pasta Roller Attachments
Ingredients
- 400 g white pasta flour alternatives: all-purpose or '00'
- 400 g semolina flour fine grain, preferably for pasta
- 8 eggs whole large
Instructions
Make the Pasta
- Combine the flours. (Alternatively, you can replace the semolina flour with the white flour).Add the whole eggs and ¾ of the combined flour to a stand mixer bowl fitted with the paddle attachment. Mix the eggs and flour together on low-medium speed (with the paddle attachment) until the dough is shaggy.
- When the dough begins to look shaggy, replace the paddle attachment with the dough hook.If needed, push the dough down from the sides of the stand mixer towards the center of the bowl. This will help the dough hook to better knead all of the dough.On low speed, knead the dough until it is firm, smooth and elastic—5-8 minutes. The final dough should not stick to your hands.Add the rest of the flour as needed to ensure a dough that is not sticky—that is firm, smooth and elastic to the touch.
- The dough is finished when it's ball-like, firm, smooth and a elastic. When you push in on the dough with your finger, it should spring back. It's ok if you can still see an indent where your finger pressed, however you should see that the dough did noticeably retract.
- When the fresh pasta dough is ready, cover it with cling film and let the dough rest for 30 minutes in the refrigerator.
Stretch the Pasta
- Work with one portion of the dough at a time. If you've made pasta dough for 8 (with 8 eggs), work with ⅛ of the dough at a time.Keep those pieces you aren't working on covered or wrapped in plastic. This will prevent the pasta from drying out.
- Place ⅛ of the dough on a well-floured surface. Flour both sides of the dough. Roll or press the dough into a ¼ inch (½ cm) thick rectangle.
- Pass the floured rectangle through a pasta roller, starting at the widest setting. Feed dough into machine short-side first. Then, place the dough lengthwise on the floured work surface. Fold the dough as you would a letter, starting with one side. Roll out the dough again till it is ¼ in (½ cm) thick.
- The short side of folded dough rectangle should be about ¾ the width of your pasta roller (no more). Then, pass the pasta through the roller again.Reduce the width of the pasta roller one setting. Pass the pasta through the roller again. Always feed the pasta in short-side first
- Continue passing the sheet of pasta through the roller, each time reducing the roller width one setting until the resulting pasta is the thickness required for the pasta you are making!