Italy’s most traditional meat tortellini recipe is undoubtably Tortellini Bolognesi!
This is the official recipe from Bologna, Italy. Most every region in Italy has adopted the tradition of making tortellini for the Christmas season, with recipes varying by region and even family. However, the Bolognese Tortellini remain the most canonical in Italy.
Watch the Video Recipe!
Watch the video recipe for Tortellini Bolognesi (narrated in English) from our YouTube Channel:
Subscribe to our YouTube Channel
More video recipes? Subscribe to our YouTube Channel (it’s FREE) and click the bell to get notifications when we release a new video recipe!
How to Make Traditional Meat Tortellini
Traditional Meat Tortellini Filling: Ingredients
All of the meat ingredients in the Bolognese tortellini filling are cooked or cured so there is no need to worry about uncooked filling! Here are our ingredients:
Pork Loin
Pork loin is the only ingredient we need to cook ourselves for the Bolognese Tortellini filling. Brown all sides of the pork loin in butter, then finish cooking it in the oven.
Finish the pork loin in a pre-heated oven at 375° F (190°C) until the internal temperature of the pork has reached 140°F (60°C).
Then, we grind it with the other meats to make the filling base.Mortadella and Prosciutto
Italian Mortadella is a cooked pork deli meat traditional to Bologna. It is made of finely chopped cooked pork combined with pieces of pork fat (usually from the neck). In Italy is it often flavored with pieces of black pepper or pistachio!
Is it the same as bologna (baloney)? No. Bologna is based on the Italian mortadella. However in the US and other countries, the meat can also include turkey, beef, venison, soy and other ingredients. Unlike mortadella, it does not have visible pieces of fat.
This traditional tortellini also calls for a sweet prosciutto. We prefer Prosciutto di Parma.
In this tortellini recipe, mortadella and prosciutto are ground with cooked pork loin to create a ground meat filling.
We use a stand mixer attachment (affiliate link) for our Kitchenaid Stand Mixer (affiliate link) to grind tortellini filling. We pass the meat through three times, reducing the size of the grind with each pass. At the end, our ground meat looks like this:
Parmigiano Reggiano Cheese
Parmigiano Reggiano cheese is another regional cheese featured in this traditional tortellini. For this recipe, it should be ground to a fine powder. It is sold like that in most supermarkets, however Parmigiano is always tastiest when freshly ground!
NOTE: Do not use so-called Parmesan for this recipe. Parmesan outside Italy (especially in the US) can be used to refer to any number of aged cheeses that pale in comparison to the real Parmigiano Reggiano. Instead, purchase the real deal. You won’t believe the difference in taste!
We grind our Parmigiano with a food processor grating attachment (the finest one), then pass the cheese through a fine sieve as well to make it super powdery!
Add the Parmigiano to the ground meat:
Nutmeg
This recipe calls for a WHOLE nutmeg (freshly ground or finely grated, preferably). However, it’s the perfect quantity of nutmeg for this quantity of meat—so add it all!
Beaten Eggs
This helps our tortellini filling to better bind together!
Making Traditional Tortellini Pasta Dough
The traditional tortellini recipe calls for a simple egg pasta dough. Technically, the recipe calls for just 300 g of flour and 3 eggs. However, we are quite good at pasta making and see no way to use all of the filling with this amount of pasta dough.
For this reason, we recommend you double the dose and make:
- 600 g of pasta flour
- 6 whole eggs (large)
Beginner at making Pasta Dough? Please see our guide on how to make fresh egg pasta dough to learn how to make and knead egg pasta dough for Italian pasta recipes.
Pasta Flour is best. Pasta flour really is better for making pasta. These products are made from a variety of wheat that produce a more elastic pasta dough. We recommend an Italian brand called Caputo and this product (affiliate link) specifically —which we absolutely love for pasta making!
Stretch the Dough for Tortellini
Traditional tortellini should be stretched to a thickness of 6/10 mm—so well under 1 mm.
- pasta thickness for tortellini: 6/10 mm
The result will be paper thin pasta. If you hold your hand behind the pasta in front of the light you should be able to see your hands move.
A pasta roller is the best tool for doing this job. Using our Imperia hand crank pasta roller this is the last (thinnest) setting on the pasta roller.
Using a pasta roller for our KitchenAid stand mixer (affiliate link), this was the second to thinnest pasta roller setting.
Just stretch one portion of pasta dough at a time (about 100 g). Leave the rest of the dough covered in plastic while working to prevent it from drying out. Dry pasta won’t stretch!
Shape the Tortellini
Once a portion of pasta dough is stretched to under 1 mm, cut the sheet of pasta into 1″ squares (3 cm).
- Square size? 1.25″-1.5″ (3 cm)
There is a pretty handy pasta cutting tool (below) for doing this job. This one is a bit lightweight (sometimes you’ll have to go over a score twice to cut the pasta). However, what it lacks in weight, it makes up for in ease of changing the width of the cuts. The wheels you see below pop in and out to create different widths.
Once the sheet/s of pasta are cut into squares, add a small amount of tortellini filling to the center of each one.
Add all of the filling before shaping any tortellini! The filling helps to keep the pasta squares moist. Add a ball of filling about the size of a hazelnut to the center of each square.

To fold the tortellini:
- Fold the square into a triangle. Press to seal the edges.
- Fold the bottom of the triangle. Just a tiny bit of the top of the triangle should stick out.
- Make a ring. Fold the left and right corners of the tortellini around the tip of a small finger. Overlap the corners and press to seal.

Shaping Tortellini: Tips
Lightly Flour the Work Surface
- Lightly flour the work surface—very lightly! Unlike ravioli, the bottom of the square of pasta need to be moist enough to seal when the final tortellini is folded. If there is too much flour under the pasta squares, it will be difficult to get the folded tortellini to seal properly.
Stretch One Portion of Pasta at a Time
- Stretch one portion of pasta at a time. Fill and fold those tortellini before stretching the next batch of pasta dough
Fill All Squares Before Folding Any
- Filling before Folding! Add filling to all prepared squares before starting to fold that batch of tortellini—This helps the squares to stay moist enough to seal when folded
Pasta Squares Too Dry to Seal?
- Pasta squares too dry to seal? If the pasta squares are too dry to hold together when you fold the tortelli, give them a light spray with water before folding them.
Drying and Storing Homemade Meat Tortellini
Once all of the homemade tortellini are prepared, let them dry (no overlaps) on parchment paper-lined cookie sheets or a lightly floured work surface. Better yet, use a stackable pasta drying rack!
Let the tortellini dry for 1-2 hours.
Then, you can freeze them if you like. Place them in the freezer to freeze with no overlaps. You can literally transfer them on the cookie sheet or drying rack to the freezer.
Once the tortellini are completely froze, you can transfer them to a freezer-safe bag or container with no worries about overlapping them.
Do not thaw frozen tortellini before cooking them.
Simply toss them in the boiling water frozen.
Remember: the tortellini filling is already cooked! So unlike some kinds of meat-filled pastas, we do not need to worry about cooking the pasta until the filling is done inside. We simply need to cook the tortellini until the pasta itself is al dente!
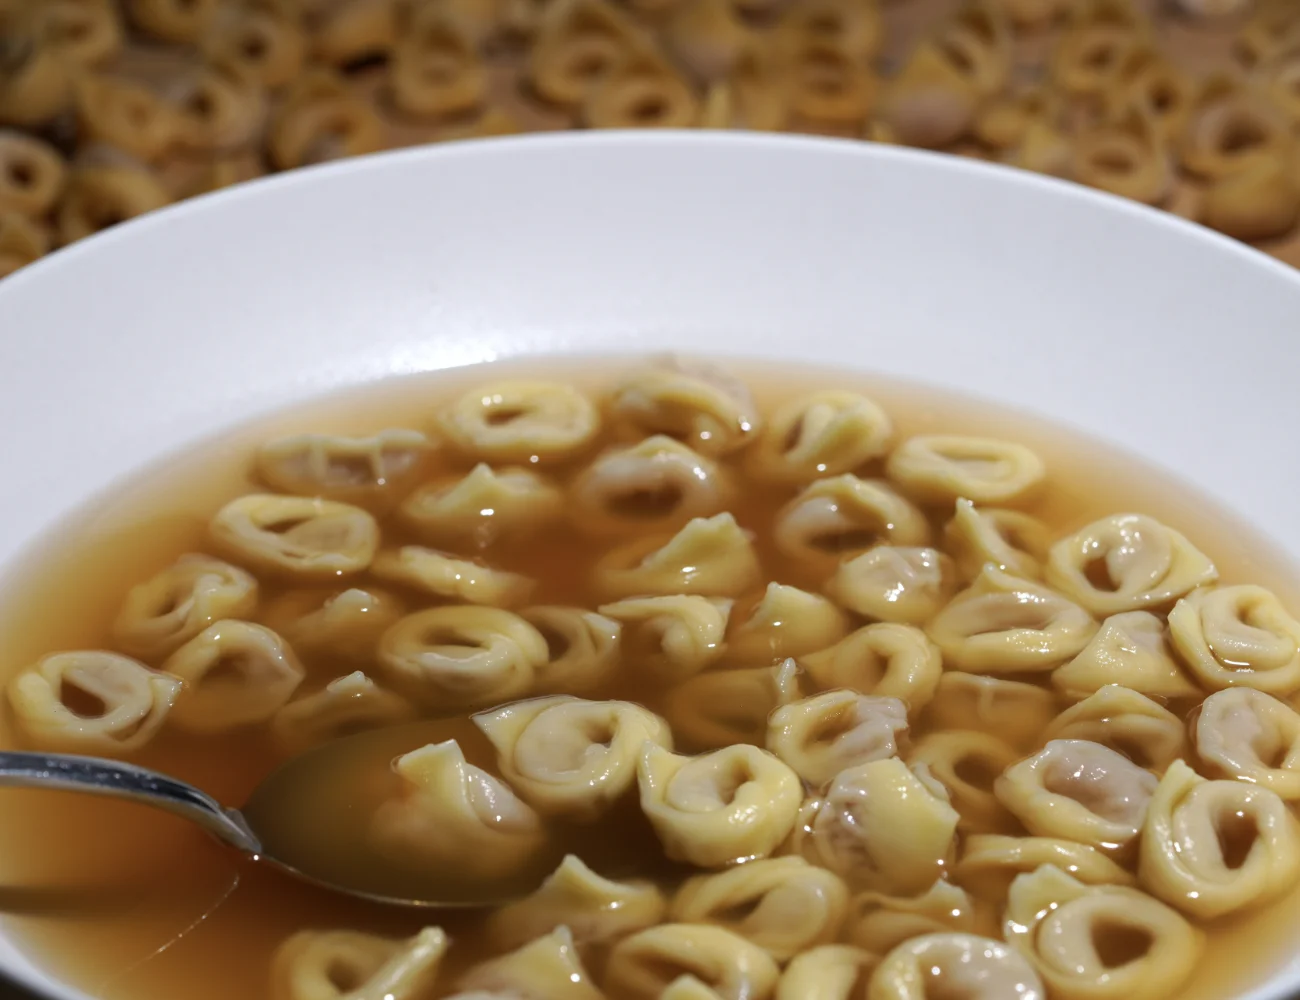
Cooking and Serving Meat Tortellini
Traditional tortellini are typically cooked in white bone broth (chicken and beef stock) or salted water. Cooking tortellini in broth is by far the most common way to cook them.
They are then served with the broth as a tortellini soup. Buon appetito!
Tortellini with Butternut Squash Filling?
Check out our recipe for Butternut Squash Ravioli! Use the filling from this recipe to make tortellini instead of ravioli!

Traditional Meat Tortellini Recipe from Bologna
Equipment
- 1 pasta roller or, use a large rolling pin if you are really good!
- 1 food grinder meat grinder or food processor for grinding the meat ingredients
- 1 pasta cutter for ravioli (optional) to cut the pasta sheets quickly into squares
Ingredients
Tortellini Filling
- 11 oz pork loin
- 11 oz mortadella a deli meat similar to bologna
- 11 oz prosciutto Prosciutto di Parma or similar
- 16 oz Parmigiano Reggiano Cheese finely grated
- 3 whole eggs
- 1 whole nutmeg yes- one whole! Freshly ground
- 3 tbsp clarified butter for browning the pork loin; clarified butter is best!
- fine salt to taste; you probably won't need this as the other ingredients are quite salty!
Pasta Dough for Tortellini
- 21 oz pasta flour
- 6 whole eggs large
Instructions
Cook the Pork Loin
- Brown all sides of the pork loin in a pan or skillet with a few tablespoons of butter. It's best to use clarified butter, due to its high smoke point.11 oz pork loin, 3 tbsp clarified butter
- Finish cooking the pork loin in a pre-heated (static) oven. Cook at 375° F (190°C) until the internal temperature of the pork has reached 140°F (60°C).
- Cut the cooked pork loin to large pieces to prepare it for grinding.
Prepare the Tortellini Filling Ingredients
- If needed, grate the Parmigiano cheese into a fine powder-like consistency.16 oz Parmigiano Reggiano Cheese
- Grate/grind one whole nutmeg.1 whole nutmeg
Make the Tortellini Filling
- Using a food grinder, grind the following into a smooth paste: cooked pork loin, prosciutto, and mortadella.11 oz prosciutto, 11 oz mortadella
- To the ground meat, add: finely grated Parmigiano cheese and the nutmeg. Mix thoroughly.
- Taste for salt. Add a pinch if needed. Then add the eggs (beaten). Mix to combine. The tortellini filling should be a compact and dry. Set aside.fine salt, 3 whole eggs
Make the Pasta Dough
- Add the pasta flour to a large bowl or work surface. Make a well in the center of the flour and add the whole eggs.21 oz pasta flour, 6 whole eggs
- Use a fork to beat the eggs into the flour, pulling in flour from the sides as you do this. Continue mixing the eggs with the flour until you've produced a shaggy dough.
- Press the shaggy dough into a loose ball and transfer to a work surface (if you mixed in a bowl). Add flour as needed to create a dough that is not sticky. You may not need all of the flour that the recipe calls for. You may need a bit more.
- Knead the pasta for about 10 minutes—until the dough ball is smooth and elastic. When you push gently in with your finger, the finished dough should spring back.
- Cover and let the dough rest for at least 30 minutes before stretching it.
Stretch the Pasta Dough
- Work with one portion of pasta dough at a time (about 100 g). Keep the rest of the pasta dough covered when you are not working with it, to prevent it from drying out.
- For each portion of pasta: Press the piece of pasta into a rough rectangle. Pass the pasta through a pasta roller at the widest setting. Fold the pasta into a letter—about 3/4 the width of the pasta roller. Then, pass the pasta through the roller at the widest setting one more time.
- Continue passing the pasta through the pasta roller, reducing the roller width by one setting with each pass. Stretch the pasta in this way until the pasta is less than 1 mm in thickness—paper thin! The recipe precisely calls for the pasta to be 6/10 mm thick.
Shape the Tortellini
- Transfer the thin sheets of pasta to a very lightly floured work surface.
- Cut the sheets of pasta into 3 cm squares (1 ¼- 1½ inches).
- Add a small amount of tortellini filling to the center of each square—about the size of a hazelnut. Add filling to all of the cut squares before starting to fold the tortellini. This will give the cut squares some moisture and prevent them from drying out as quickly.
- For each square: Fold into a triangle, pressing the edges to seal. Fold the bottom half of the triangle (with the filling) up. A small amount of the triangle should still be visible at the top. Fold the right and left corners of the triangle around the tip of a small finger (like a ring). Press the corners together to seal the ring.
- When all of the tortellini are folded and finished, stretch another portion of pasta and continue—until all of the filling has been used!
- Transfer the finished tortellini to a lightly floured work surface, parchment paper or pasta drying rack.
- After 1-2 hours of drying (outside of the refrigerator), you can freeze the tortellini. Freeze the tortellini without overlapping them. Once frozen, you can transfer the frozen tortellini to a freezer-safe bag or container with no worries about overlapping them—frozen tortellini won't stick together.
Cook the Tortellini
- Cook the fresh or frozen tortellini for 4-5 minutes in gently boiling broth or salted water. Cook until the pasta dough is al dente.
- Traditionally, these tortellini are also served in the same broth —creating tortellini soup!
Video
Notes
- stretch just one portion of pasta at a time (about 100 g)
- add filling to all of the cut squares before starting to fold the tortellini. The moisture from the filling will prevent the pasta from drying out as quickly.
- spray with water —Use a spray bottle with water if needed to rehydrate the square of pasta and to get a better seal!
🇬🇧 This is the English-language version of our original Italian recipe on PIATTO Ricette.
La ricetta è perfetta! Buon appetito, anche se non si dice più!
Original comment: View on YouTube
Very good , delicious
Original comment: View on YouTube
Sublimeeeeee….grazie
Original comment: View on YouTube
La mia famiglia mette mortadella, parmigiano, manzo, pollo e maiale, la carne rigorosamente cotta in padella, poi tritata una volta sola e impastata con uovo. D’obbligo il riposo in frigorifero per almeno una notte
Original comment: View on YouTube
Assolutamente solo in brodo
Original comment: View on YouTube
farina con P/L 0,7 – 0,8 in pratica dovremmo usare una manitoba con valore 450W e oltre ovvero una farina di oltre 16gr di proteine, per intenderci quella speciale da pasticceria che si usa per i grandi lievitati tipo panettone-pandoro… ? 🤔
Original comment: View on YouTube
Una noce moscata? Mi pare eccessiva, troppa è tossica
Original comment: View on YouTube
Sempre fatti così. Imparato primi anni 90 , Ristorante Rodrigo, Bologna,avevamo 4 sdaure,una novant’anni. ❤
Original comment: View on YouTube
Anche la mia mammina
Original comment: View on YouTube
Grazie, la mia nonna di modena, mi ha insegnato a farli esattamnte come voi e tutti gli anni continuo a farli pr la mia famiglia
Original comment: View on YouTube
grazie grazie grazie a mio giudizio la ricetta più bella e penso anche la più buona la provo oggi stesso
Original comment: View on YouTube
Viene l’acquolina in bocca solo guardando il video, che risveglia i teneri ricordi dei tortellini in brodo fatti dalla nonna per Natale e non solo.Una curiosità: non riesco ad identificare la provincia di provenienza della voce fuori campo. Direi centro Italia (io sono pisano), anche se non ci metterei la mano sul fuoco.Vivo all’estero e a volte collaboro come Native speaker con insegnanti privati di italiano e la domanda che fanno più frequentemente gli studenti quando ascoltano qualcuno dal vivo o in video è: da quale regione viene la persona che parla? Grazie dell’attenzione, Velthur.
Original comment: View on YouTube
Mmmh ❤😅
Original comment: View on YouTube
Ottimi come li faccio io
Original comment: View on YouTube
Io non ho il tritacarne, mannaggia!😊
Original comment: View on YouTube
Grazie!!!!!!❤❤❤❤❤❤🙏🙏🙏🙏🙏
Original comment: View on YouTube
il ripieno è macinato troppo fine troppo fine io lo uso leggermente più grossolano altrimenti sembra omogenizzato. la carne di maiale la cuocio solo al tegame sfumata con vino bianco e un poco di brodo da non farla seccare. Questa la ricetta della mia famiglia. In bocca la carne deve distinguersi dalla pasta e’masticando che i sapori si amalgamano e entrano in contatto con il sapore del brodo e si armonizzano. Questa la mia modesta opinione
Original comment: View on YouTube
Nel Delta li chiamiamo: Caplit! (Cappelletti)
Original comment: View on YouTube
Non ho il tritacarne come faccio
Original comment: View on YouTube
Scusate ma quante persone possono mangiare con queste dose, persone che mangiano grazie mille
Original comment: View on YouTube
Personalmente il brodo lo preparo il giorno prima, lo metto in frigo o fuori dalla finestra. La mattina dopo lo sgrasso cosi diventa più salutare.😊
Original comment: View on YouTube
ma volendone fare 250 di tortellini le quantità quali sono?
Original comment: View on YouTube
Mia mamma tirava la sfoglia col matterello in un disco perfetto e sottile, il sapore indimenticabile.
Original comment: View on YouTube
Finalmente qualcuno che dice la ricetta perfetta, non solo per il ripieno ma anche per il brodo: manzo e gallina. Basta con questa mania del brodo di cappone!
Original comment: View on YouTube
Posso evitare di finire la cottura della carne in forno?Ho paura si asciughi troppo……Perché questo ulteriore passaggio?
Original comment: View on YouTube
Un’ora a farli due minuti mangiarli e il ricordo ti accompagna per tutta la vita
Original comment: View on YouTube
Dio, che bontà e quanto mi mancano! Ho vissuto a Bologna per quasi 20 anni, 30 anni fa e non c’è giorno in cui non penso a quelli e ai tortelloni. Li ho fatti più volte in questi anni e magari per Natale li farò con la tua ricetta ma cosa non darei per andare al mercato e comprare qualche etto dalle sfogline lì. Saluti da Aotearoa Nuova Zelanda.
Original comment: View on YouTube
Spiegata benissimo,bon appeti😊
Original comment: View on YouTube
Je crois que c’est la meilleure vidéo que j’aie vue sur le pliage des tortellini. Pardon ! Je suis française ❤
Original comment: View on YouTube
Buonissimi grazie
Original comment: View on YouTube
Questa e’la tipologia di video che adoro
Original comment: View on YouTube
Buoniiii
Original comment: View on YouTube
Tutto ok tranne la specifica che il ripieno deve riposare una notte in frigorifero…per il resto perfetto!
Original comment: View on YouTube
come si fa a farli così piccoli? dipende dalla grandezza delle mani? inoltre se possono tranquillamente congelare e buttarli direttamente nel brodo al momento?
Original comment: View on YouTube
Complimenti. Un insegnamento semplice ma professionale. Ad Maiora.
Original comment: View on YouTube
Che bellezza….
Original comment: View on YouTube
Greetings,
Divya here with NTD Television. We are one of the world’s fastest growing media companies with over 100 million fans and 1 billion monthly video views across all of our social properties. Our motto is truth, hope, and humanity.
We love your videos and our editors would like to showcase it by uploading it on some of our social media pages and websites so that our fans can see it. Of course, we are happy to credit your channel clearly to make sure people know how to find you and your videos. You will still hold the exclusive rights to the video.
Can we have your permission to do that?
Kind regards,
Divya
Original comment: View on YouTube
Grazie per la ricetta, che bravo chef, auguri e buone feste.
Original comment: View on YouTube
ma non è vero che la noce moscata si deve sentire e ce ne vuole tanta, la confraternita stessa dice che deve essere appena percettibile.
Original comment: View on YouTube
Ma dove sono i 50milioni di iscritti a questo canale?Mai vista questa qualità, da brividi.
Original comment: View on YouTube
Video molto bello la spiegazione esauriente non resta che prepararli
Original comment: View on YouTube
Fantastico! I tortellini in brodo sono qualcosa di geniale, un nostro eterno vanto. Qui sono stati spiegati proprio bene.
Original comment: View on YouTube
Da bolognese ti dico proprio bravi..unica cosa è d’obbligo il mattarello…faticoso ma si sente la differenza…comunque complimenti davvero
Original comment: View on YouTube
🏌🏼♂️👏🇧🇷
Original comment: View on YouTube